
So, what exactly is God Mode in Windows 7?
Well, for starters, it’s not really a mode. And it’s nothing you need to be a deity to pull off, either.
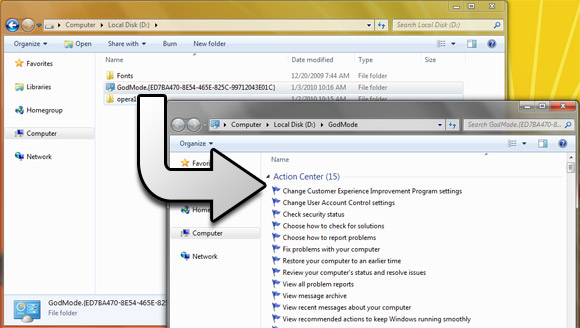
Rather, it’s a folder packed with shortcuts to just about every settings change and administrative function in Windows 7. Everything you’ll find in the Action Center, Backup and Restore, Autorun, Desktop Gadgets, Devices and Printers — it’s all there. All dumped in one central location for easy access.
No, this trick doesn’t involve entering IDDQD in the run box – but it’s just about that simple. Here’s the magic,
- Create a new folder anywhere (I set mine up in d:\)
- Rename the folder and paste in the following text: GodMode.{ED7BA470-8E54-465E-825C-99712043E01C}
That’s it! You’ve now got your new, somewhat handy folder. Why somewhat handy? Well, because you can already access everything in there by typing a few letters into the search box on your start menu.
Still, it’s a pretty long list of things to remember – so having a nice reference like this could actually be useful from time to time


