Steps to Block a Program in a Firewall
This tutorial on how to block a program in a firewall applies to computers running Microsoft Windows 11 operating system. Some details might vary slightly for Windows 10 or older versions, but the procedure is essentially the same.
1. Open the Settings for Windows Defender Firewall with Advanced Security
Use one of the following methods to open the Windows Defender Firewall with Advanced Security.
Method 1
- Press the Windows key and the R key at the same type to open the Run dialog box.
- Type “WF.msc” into the box.
- Hit the “OK” button or Enter.
Method 2
- Press the Windows key to open the search function.
- Start typing “Windows Defender Firewall” and select the application when it appears.
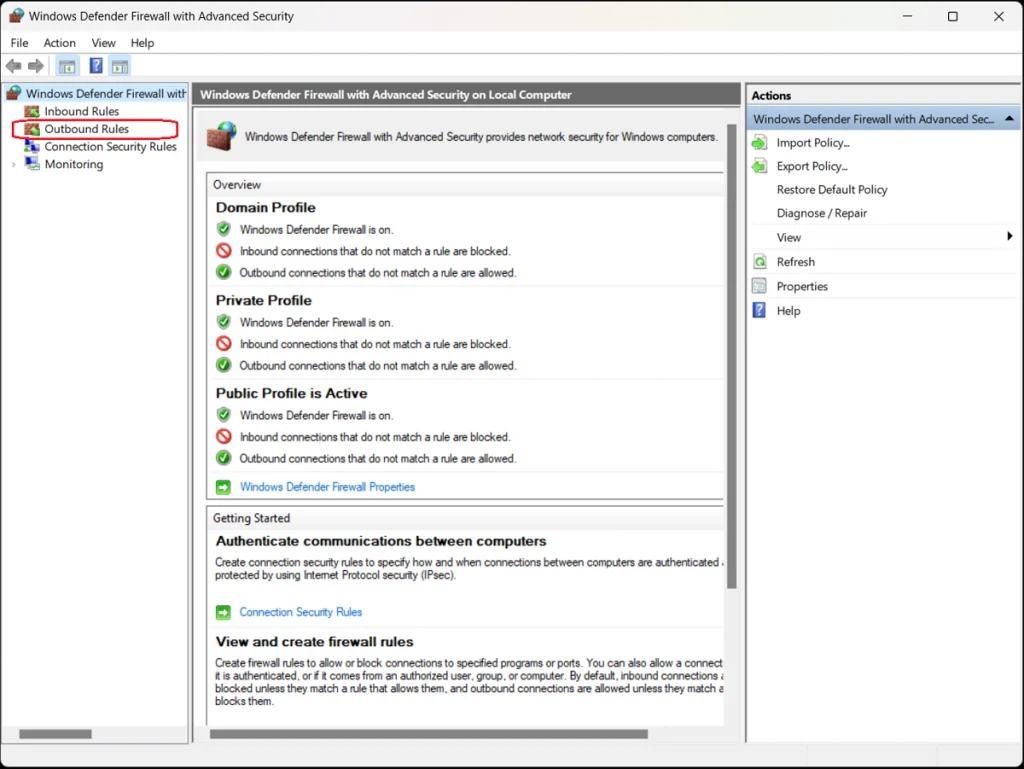
- From the Windows Defender Firewall screen, select Advanced Settings in the left sidebar.

2. Select Inbound Rules or Outbound Rules
Choose whether you want to set an inbound rule allowing access to your computer for an external application or program, or an outbound rule allowing an application or program installed on your computer external access through the firewall.
The program-blocking process is similar for both types of rules—for this example, we’ll choose Outbound Rules to block a program in the firewall.
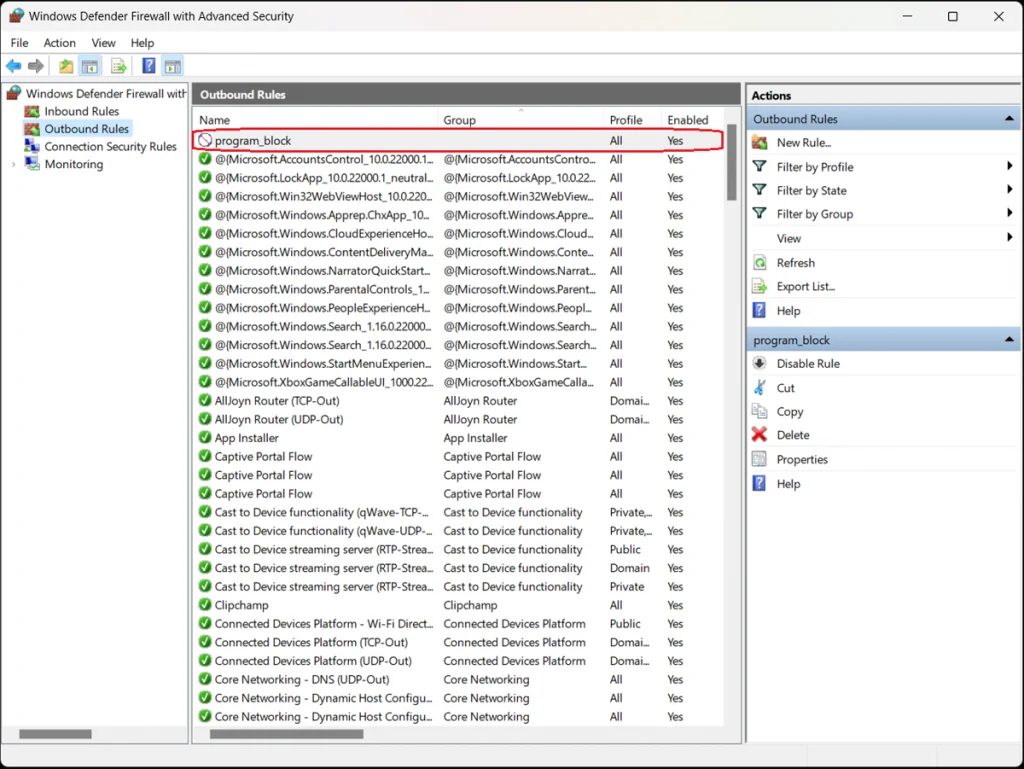
Select the appropriate option from the left sidebar of the Windows Defender Firewall with Advanced Security screen. A list of outbound rules appears detailing their names, groups, profiles, and status (enabled/disabled).
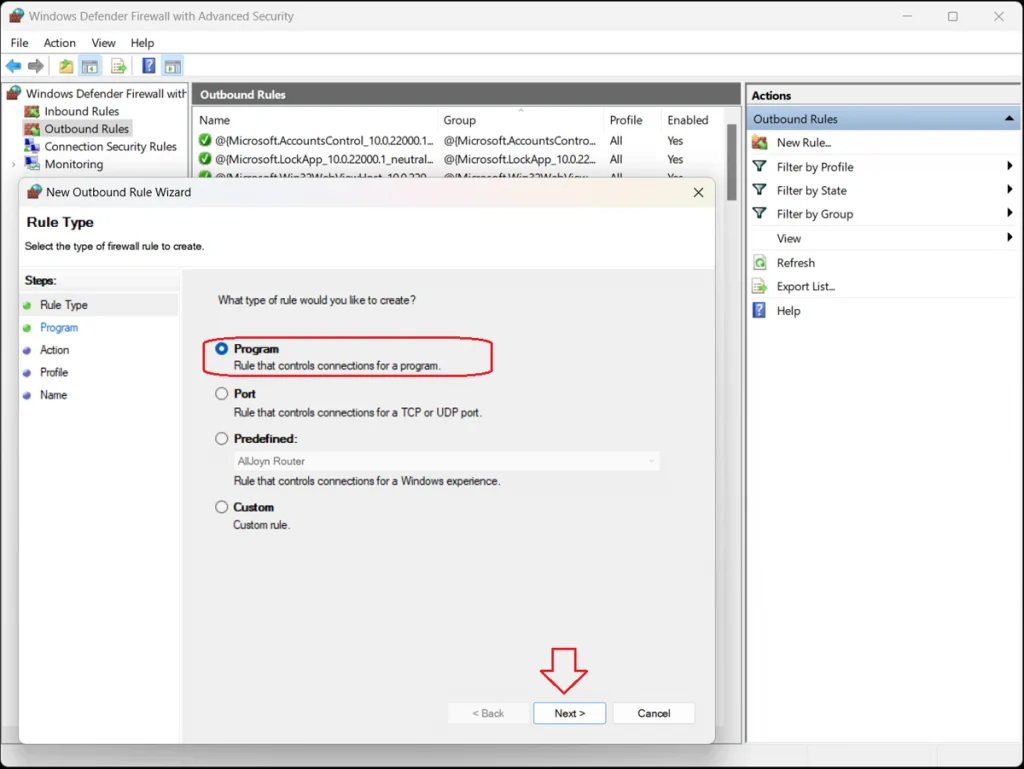
3. Create a New Rule
In the sidebar to the right of the list of existing outbound rules, click the “New Rule…” option. The New Outbound Rule Wizard opens, presenting four options for type of outbound rule:
- Program
- Port
- Predefined
- Custom

4. Select “Program”
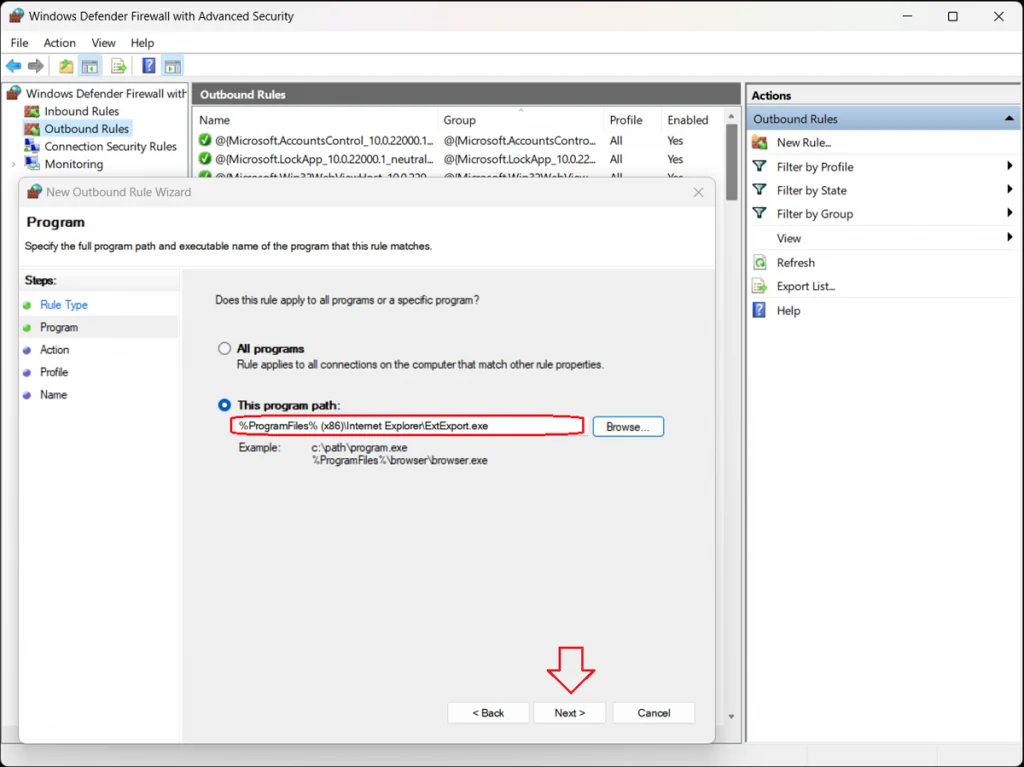
Select Program and click the “Next>” button. The Program dialog box opens to ask whether you want this rule to apply to all programs or just one specific program.
To block a specific program, select the “This program path” option and click the “Browse…” button to open the program folder.
Locate and select the executable file (.exe) for the program you want to block.
Click the “Next>” button.
5. Block the Connection
The Action window of the New Outbound Rule Wizard opens, presenting three options:
- Allow the connection. This includes connections that are protected with IPsec and well as those that are not.
- Allow the connection if it is secure. This includes only connections that have been authenticated by using IPsec. Connections will be secured using the settings in IPsec properties and rules in the Connection Security Rule node.
- Block the connection. This blocks the connection.
Select “Block the connection” and click the “Next>” button.

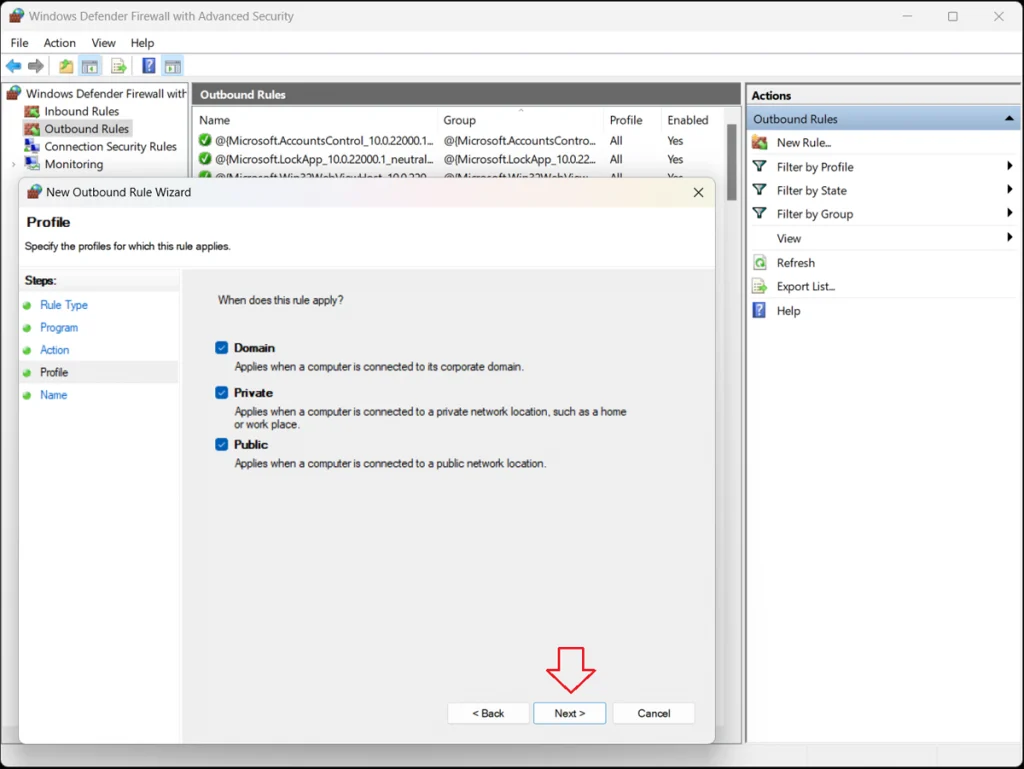
6. Specify the Profiles
The Profile window of the New Outbound Rule Wizard opens, presenting three options:
- Domain–Applies when a computer is connected to its corporate domain.
- Private–Applies when a computer is connected to a private network location, such as a home or workplace.
- Public–Applies when a computer is connected to a public network location.
Specify when the rule will apply and click the “Next>” button.
7. Assign the Rule a Name and Description
The Name window of the New Outbound Rule Wizard opens. In the empty fields, assign a name and description for the rule. Click the “Finish” button.

The Windows Defender Firewall with Advanced Security box lists all the existing outbound rules. Confirm that your new rule is included in the list. The program is now blocked; to unblock it, simply select and delete the rule.
You can unblock other programs the same way—to find them, sort the list by name, profile, state (enabled/disabled), or group and click Disable Rule in the right sidebar. You can also perform cut, copy, and delete rules or view their properties.