May 25th, 2019
  Kapuwa
 How to disable Sign-in screen blur background using Settings
The easiest and safest process to disable the acrylic material effect in the Sign-in screen background is to use the Settings app, with these steps:
- Open Settings.
- Click on Personalization.
- Click on Colors.
- Turn off the Transparency effects toggle switch.

Once you complete these steps, the Sign-in screen will show a clear background like in previous versions. The only caveat to using this option is that you’ll also lose the transparency effects across the desktop and apps.
How to disable Sign-in screen blur background using Group Policy
If you’re running Windows 10 Pro (or Enterprise), you can disable the acrylic material effect from the Sign-in screen using the Local Group Policy Editor.
- Use the Windows key + R keyboard shortcut to open the Run command.
- Type gpedit.msc and click OK to open the Local Group Policy Editor.
- Browse the following path:
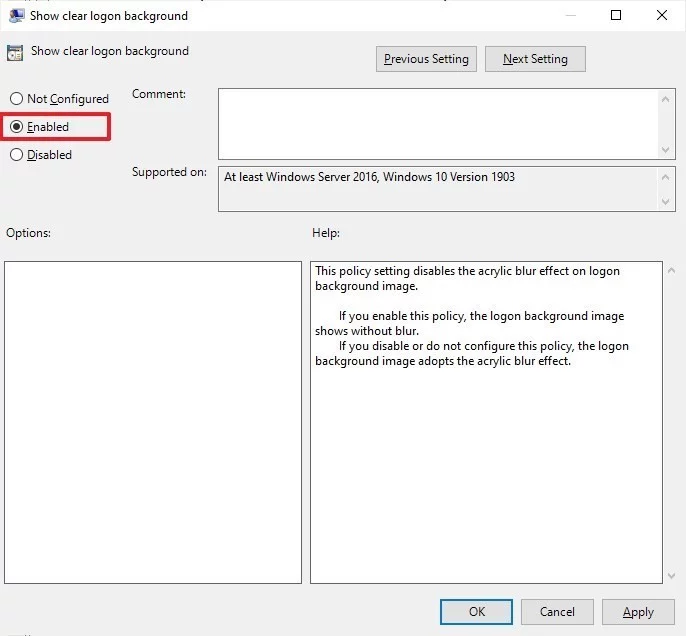
Computer Configuration\Administrative Templates\System\Logon - On the right side, double-click the Show clear logon background policy.
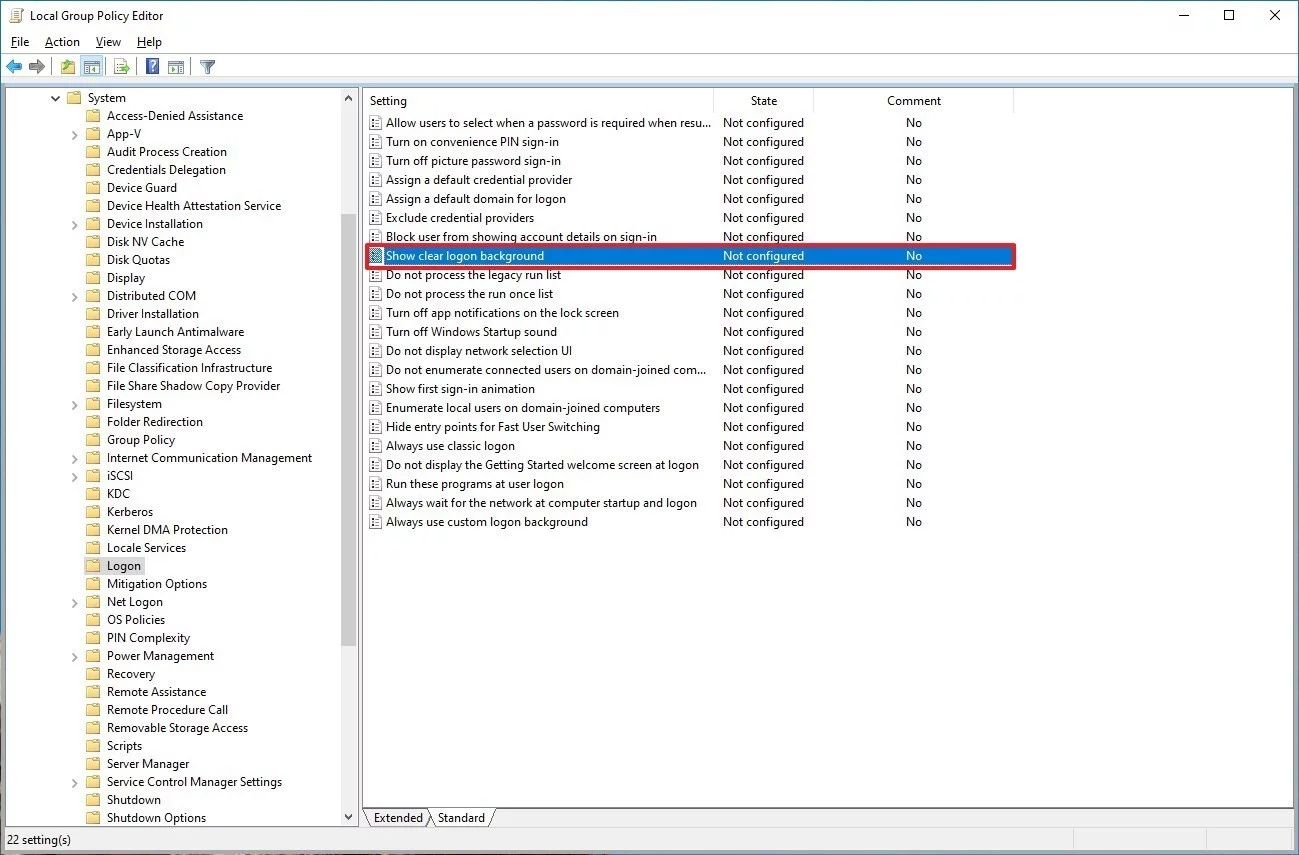
- Select the Enabled option.
- Click the Apply button.
- Click the OK button.
After completing the steps, the Sign-in background will show a clear background without disabling the transparency effects across the desktop and apps.
If you change your mind, you can rollback the previous settings using the same instructions, but on step No. 5, select the Not Configured option for the policy.
How to disable Sign-in screen blur background using Registry
If you’re running Windows 10 Home, you won’t have access to the Local Group Policy Editor, but you can still disable the translucent effect on the Sign-in screen using the Registry.
Warning: This is a friendly reminder that editing the Registry is risky, and it can cause irreversible damage to your installation if you don’t do it correctly. We recommend making a full backup of your PC before proceeding.
- Open Start.
- Search for regedit, right-click the top result, and select the Run as administrator option to open the Registry.
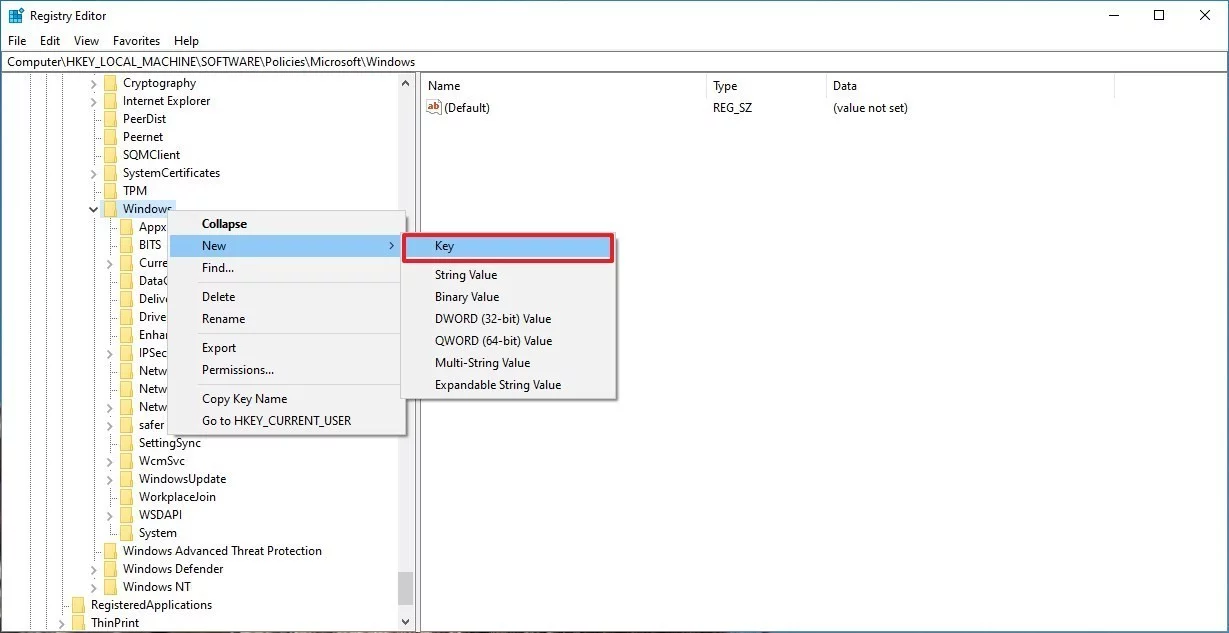
- Browse the following path:
HKEY_LOCAL_MACHINE\SOFTWARE\Policies\Microsoft\WindowsQuick Tip: On Windows 10, you can now copy and paste the path in the Registry’s address bar to quickly jump to the key destination. - Right-click the Windows (folder) key, select New, and click on Key.

- Name the key System and press Enter.
- Right-click the newly created key, select New, and click on DWORD (32-bit) Value.
- Name the key DisableAcrylicBackgroundOnLogon and press Enter.
- Double-click the newly created DWORD and set the value from 0 to 1.
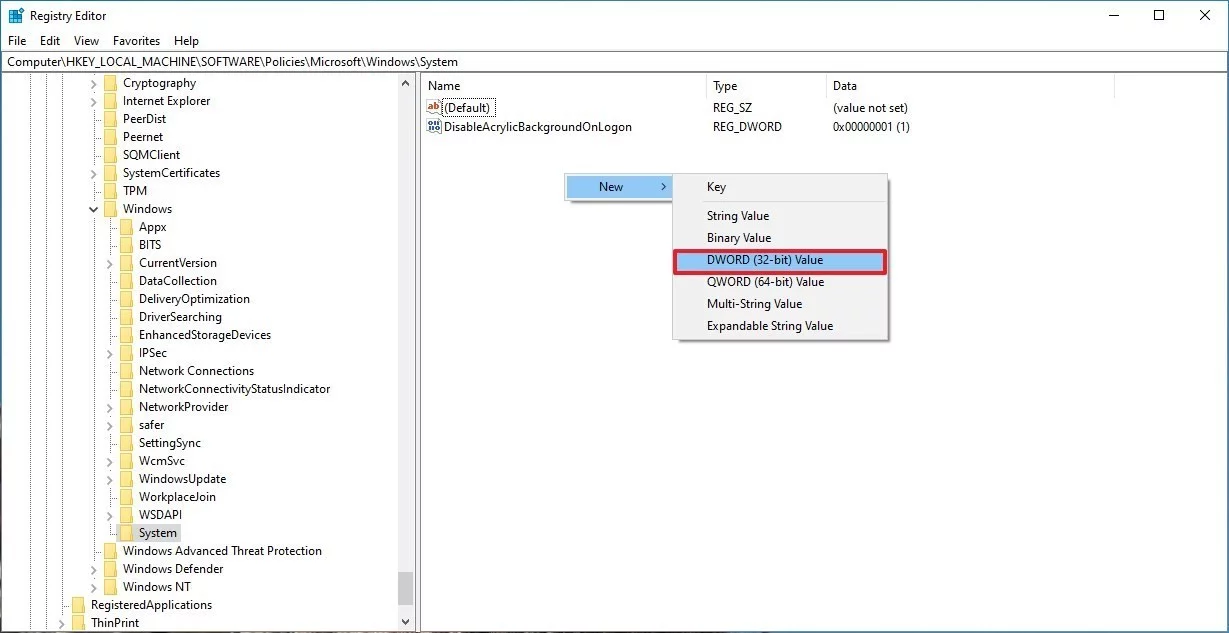
- Click the OK button.
Once you complete the steps, you should be able to lock your device, and when trying to sign-in you should now see a clear background.
You can always revert the changes using the same instructions outlined above, but on step No. 8, make sure to change the value for the DisableAcrylicBackgroundOnLogon DWORD from 1 to 0.
 Posted in