Get Windows 10 Context Menu in Windows 11

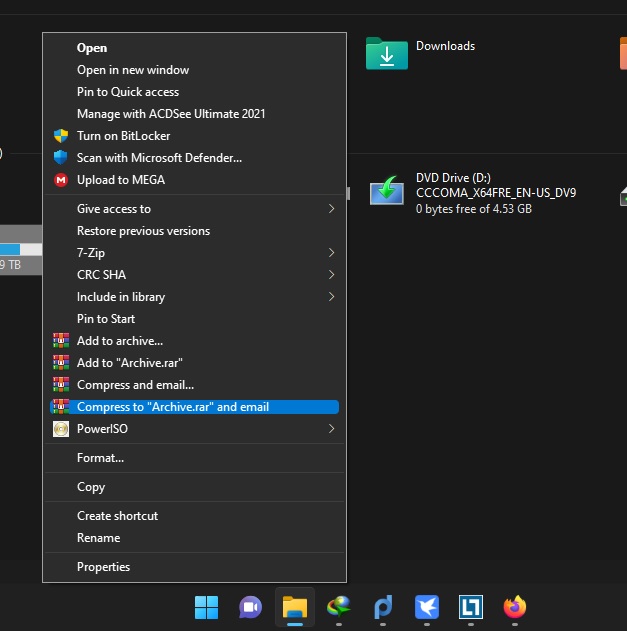
Open Command Prompt and run bellow command. and reboot the computer or go to task manager and restart “windows explorer” process

To Get Old Context Menu:

reg.exe add “HKCU\Software\Classes\CLSID\{86ca1aa0-34aa-4e8b-a509-50c905bae2a2}\InprocServer32” /f /ve

If you need to get back the New Context Menu:

reg.exe delete “HKCU\Software\Classes\CLSID\{86ca1aa0-34aa-4e8b-a509-50c905bae2a2}” /f

bypass Windows 11 TPM 2.0 requirement

UPDATE 2023-November

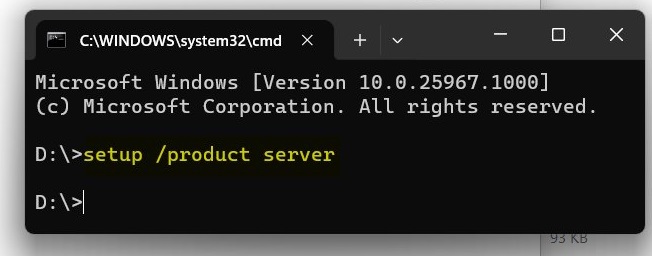
HUGE GROUND BREAKING DISCOVERY! To ALL users that don’t meet the artificial requirements for Windows 11, I GOT SOME GREAT NEWS TO SHARE! When adding “/product server” switch to setup.exe in the Windows 11 setup directory, it BYPASSES the Windows 11 hardware requirement checks.

Method: Modify Registry

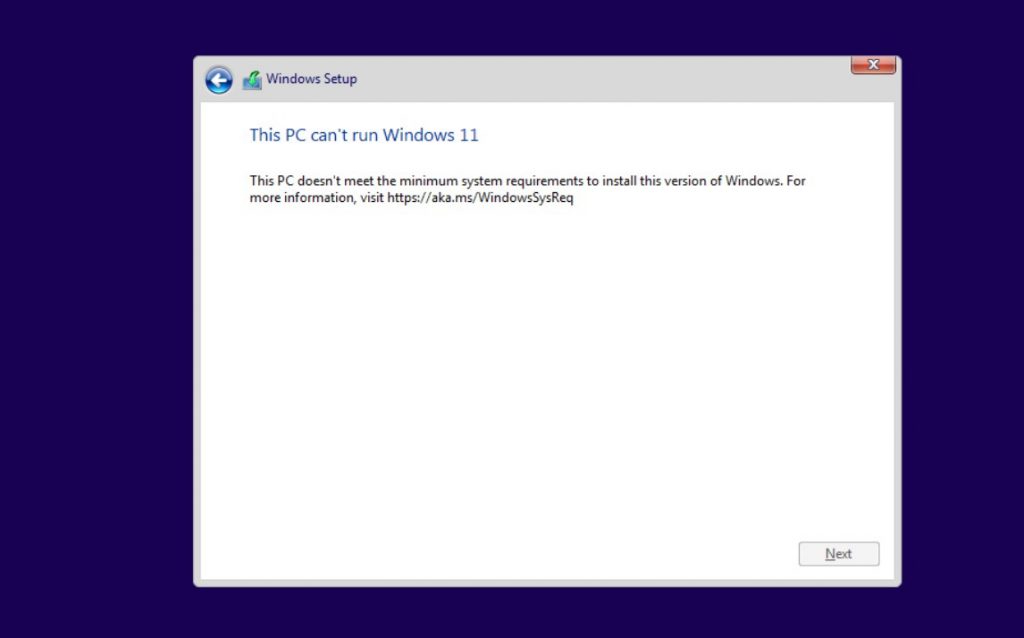
This method involves simply editing Windows Registry during the installation process of the new operating system. On unsupported devices, if you try to install the new OS, a message will appear on your screen stating that the computer isn’t compatible.

At that screen, you need to press Shift+F10 to open Command Prompt window and modify the registry. In Command Prompt, you need to run regedit.exe and create a new key “LabConfig” under HKEY_LOCAL_MACHINE\SYSTEM\Setup. In the “LabConfig” key, create two new entries:

  • BypassTPMCheck=dword:00000001
  • BypassSecureBootCheck=dword:00000001

Save the changes and compatibility errors will disappear.

Update | 2021 – October – 06

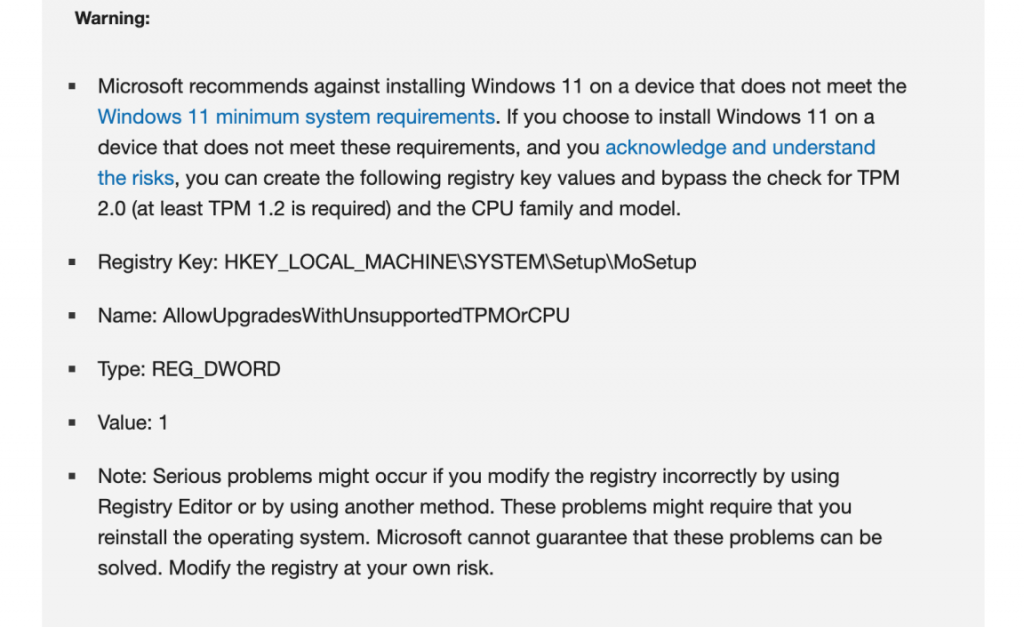
The fix itself is fairly straightforward too. Simply hit Win+r and type regedit to bring up the registry editor. Make your way to HKEY_LOCAL_MACHINE\SYSTEM\Setup\MoSetup and then right-click the main panel and create a new DWORD (32-bit) Value with a name of AllowUpgradesWithUnsupportedTPMOrCPU and set its value to 1

Server 2019 Black Screen on RDP with Domain Administrator account

I had this problem today morning with a newly installed 2019 server. it was working find until connect to domain.after joined to domain i cannot login to server with domain administrator account via RDP i just get a blank black screen.only task manager was working. after researching trying many ways this is how i manage fixed the problem

Change following setting in local GPO:

Computer Configuration->Windows Settings->Security Settings->Local Policies->Security Options

Enable “User Account Control: Admin Approval Mode for the Built-in Administrator account” which is set to “Not Defined”

After that do a gpupdate /force and try to login as domain administrator again

How to fix the Windows 10 version 2004 network connectivity bug

Windows 10 updates tend to break things, and the most recent Window 10 version 2004 update is no exception. According to numerous forum posts, the latest irksome bug prevents Windows 10 apps from accessing the internet even when the PC is successfully connected and your web browser is working just fine.

Annoyingly, the bug seems to show up without warning or reason. If you see a yellow “No Internet Access” error triangle in the Windows 10 system tray and can’t connect to the internet in apps like Steam, Spotify or Fortnite, but can browse the web as you normally would, you’ve got the bug.

Microsoft acknowledged this bug in a support forum thread and says it stems from an issue with Windows 10’s Network Connectivity Status Indicator. The company is investigating and will patch the problem it once a solution is engineered, but some users have already found a reliable workaround that should restore network connection for your apps in the meantime.

How to fix the Windows 10 version 2004 network connectivity bug

  1. Search for “Registry Editor” using the search bar in the Windows taskbar
  2. Open Registry Editor from the search results and click “Yes” when prompted to let the app make changes.
  3. In the Registry Editor app, go to HKEY_LOCAL_MACHINE\SYSTEM\CurrentControlSet\Services\NlaSvc\Parameters\Internet
  4. Right-click “EnableActiveProbing” and select Modify.
  5. Change the “Value data” from 0 to 1.
  6. Click “OK” to close the window and save your edits.
  7. Close the Registry Editor.
  8. Restart your computer for the changes to take effect.

With luck, your apps will be able to connect to the internet again once you reboot your PC. If they don’t, double-check you input that registry fix properly. If you’re still out of luck, you might have to seek out a different solution or wait for Microsoft’s patch. If you happen to have encounter another fix or discovered your own

Source | Lifehacker.com By Brendan Hesse


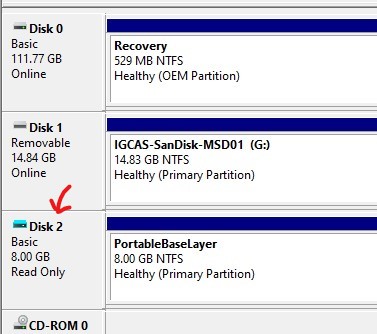
What is PortableBaseLayer Partition?

Some Windows 10 users with May 2019 update are seeing a new partition called PortableBaseLayer. If this is your first time, you might wonder what in the world is the PortableBaseLayer partition.

What is PortableBaseLayer Partition?

Before you ask me, no, PortableBaseLayer is not a virus, malware, or rouge partition.

PortableBaseLayer is a system partition created for Windows Sandbox.

When you enable the Windows Sandbox, the operating system will automatically create the PortableBaseLayer partition and places all the important files that are necessary to run the sandbox.

Depending on your usage, the partition size will be anywhere from 1GB to 10GB. Sometimes, it might even exceed that range too.

In case you don’t know, Windows Sandbox is what it sounds like. It is a built-in sandbox that lets you test programs and settings without affecting the host operating system. Compared to traditional solutions like VMware and VirtualBox, Windows Sandbox is lightweight, fast, and easy to use.

All pro and enterprise users can enable Windows Sandbox as long as the system meets the minimum requirements.

Can I Delete PortableBaseLayer Partition?

No, don’t delete the partition manually as it might corrupt the Windows Sandbox.

How to disable Sign-in screen acrylic (blur) background on Windows 10 May 2019 Update

How to disable Sign-in screen blur background using Settings

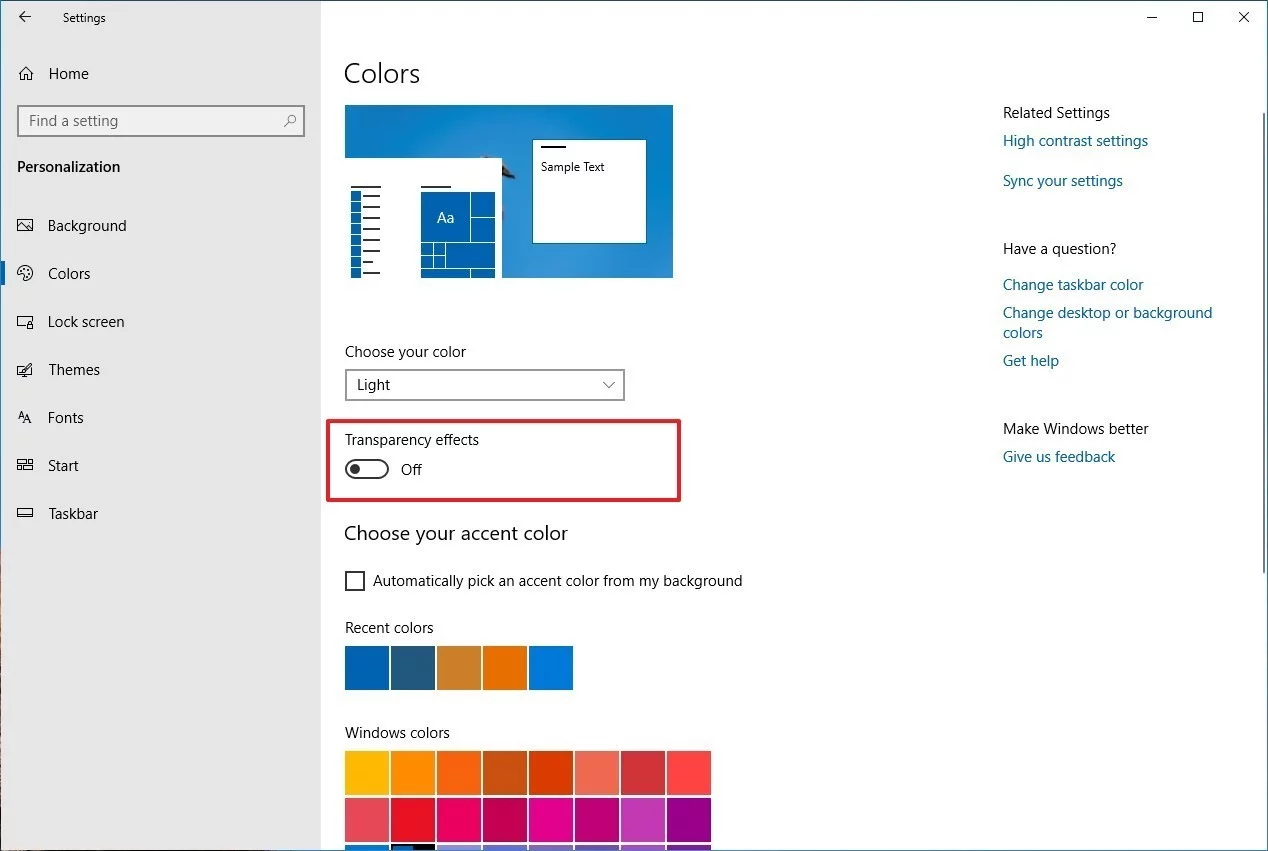
The easiest and safest process to disable the acrylic material effect in the Sign-in screen background is to use the Settings app, with these steps:

  1. Open Settings.
  2. Click on Personalization.
  3. Click on Colors.
  4. Turn off the Transparency effects toggle switch.

Once you complete these steps, the Sign-in screen will show a clear background like in previous versions. The only caveat to using this option is that you’ll also lose the transparency effects across the desktop and apps.

Read more »

Game DVR problem: “Sorry, this PC doesn’t meet the hardware requirements for recording clips.”

According to Microsoft These are the Requirements for “Game DVR On Windows 10”

Hardware requirements for Game DVR on Windows 10

To record game clips with Game DVR on Windows 10, your PC’s video card must support one of these encoders:

  • Intel Quick Sync H.264
  • NVidia NVENC
  • AMD VCE

To check the video card on your PC, go to the search box on the taskbar and search for “device manager.” In Device Manager, expand Display adapters.

Video cards that support NVidia NVENC include:

  • Most GeForce 600 series or later
  • Most Quadro K series or later

Please refer to NVIDIA NVENC Support Matrix for more details.

You always have the option to take a screenshot of your game, even if you don’t have one of these cards.

If your PC can’t record game clips, you’ll get a message like this when you try to make one:

Sorry, this PC doesn’t meet the hardware requirements for recording clips.

In that case, do one of the following:

  • Get the latest driver for your current video card (if your PC has more than one video card, make sure the drivers are up to date for both)
  • Install one of the video cards listed here

If your PC has multiple video cards and only one supports Game DVR, make sure you’re using the monitor connected to that card when you record your game.

If you have a supported video card whose driver is up to date and you still can’t record games, open Feedback Hub (a Windows 10 app) and add feedback so we can investigate.

for Original Source click Here

But i had all requirements on my Computer and i still get that error and this helped me to fix this issue.

1)Hold windows button and then press R to open RUN.
2)Type “regedit” and press enter
3)Go to HKEY_lOCAL_MACHINE/ SYSTEM/ CurrentControlSet/ Control
4)Change the entry PortableOperatingSystem from 1 to 0.
5) Reboot


Windows wouldn’t hibernate with Error Event ID 45: volmgr

Just to share my 3-day battle with Windows 7 32bit Pro after it was installed on the Kingston V+100E Self-encrypting SSD 64GB.

To be fair, the problem has little to do with the Kingston SSD actually. There may be incompatibility with Truecrypt 7.1 & Self-encrypting SSD, or it could be old registry entries left-over from my old encrypted HDD but I didn’t investigate further since I’ve solved my hibernation problem.

Update at the end of this article!

*******************************

System:

OS: Win7 32bit Pro (New install, not upgrade)

Laptop: Fujitsu T4215 with CPU upgraded to Intel T7200

HDD: WD Scorpio Black 320GB (Truecrypt 7.1 System FDE) -> Kingston V+100E 64GB (Self-encryption)

Drivers: (All updated to latest from manufacturer)

********************************

Everything seems to work well until I run Easy Transfer to transfer my account from my old HDD to the new SSD. My old WD Scorpio Black was encrypted using Truecrypt 7.1 so there were active Truecrypt registry entries which I’m not aware of & few people seem to know about. Google it & you would’t find many entries if any.

Hibernation will always fail with black screen. When KB/Mouse is touched, the login screen is shown. Event Viewer will show Event ID 45 Error caused by volmgr on \device\harddiskvolume2 (which is my C:\). What’s cryptic is the error is a crash dump driver error. What has crash-dumping in volmgr.sys got to do with hibernation?

A lot in fact, after kernel-mode drivers had crashed or unloaded, the only way the NT Kernel could do stuff is through special filters apparently. So to activate Hibernation, the Kernel has to unload everything & dump everything in RAM to HDD. What if you’re running Bitlocker or Truecrypt, which are software-based encryption?

The Kernel has to filter the RAM data thru these small programs so the Hibernation or Crash dumps are encrypted as well, else there’ll be a security risk. dumpfve.sys for Bitlocker & truecrypt.sys for Truecrypt 7. Unfortuntately I don’t see this documented anywhere. (I did not search SourceForge though.) I found out when I was hunting in the registry.

This registry key is where I found the offending entry.

HKLM\SYSTEM\CurrentControlSet\Control\CrashControl -> DumpFilters

In it, I found “dumpfve.sys” & “truecrypt.sys”. Now I did not install Truecrypt in the new system so the only way is thru’ Easy Transfer.

OK, fine, so I install Truecrypt 7.1 to make sure the proper files are installed. But after rebooting, Windows BSOD & I couldn’t see any crash dump! It may be that active Truecrypt registry is still there thinking the SSD was encrypted. Well I can’t have that! So I did a System Restore & booted up. I then remove the truecrypt.sys entry in all Registry keys, adjust my pagefile size, enabled crash dump 128KB & enabled hibernation with “-size 100”.

Hit the Hibernation button & it WORKS!!!

After that, whatever changes I did to pagefile.sys & crash dump size did not affect Hibernation.

So for those of you who have hibernation problems with Event ID 45 from volmgr. Check your crashdump filter.

Now I still need Truecrypt to access the old encrypted WD Scorpio Black, so what I did was to install Truecrypt in “Portable” mode & run the .exe files instead of an installation. Done!

Update (19/3/2012):

Recently I cleaned the registry of all entries with Truecrypt & install the latest 7.1a version & Windows did not BSOD so I’m a happy camper again. Seems like Truecrypt doesn’t leave many entries in Windows itself, which is a GOOD thing!

Thanks to (original source)

Switch Windows 10 License from KMS to MAK


First Make Sure your not having a OEM or Retail Version installed, before activate with a MAK Key

Run this command to find the Edition installed

slmgr -dli

License Type Description
Retail This when you buy a Full Packaged Product (FPP), commonly known as a “boxed copy”, of Windows from a retail merchant or purchases Windows online from the Microsoft Store. Product keys can be transferred to another PC.
OEM Product keys are issued by the original equipment manufacturer (OEM) and are not-for-resale and may not be transferred to another computer. They may, however, be transferred with the computer if the computer is transferred to new ownership. If the OEM PC came preinstalled with Windows 8 or Windows 10, then the product key will be embedded in the UEFI firmware chip.
Volume KMS Client and Volume MAK product keys, are volume license keys that are not-for-resale. They are issued by organizations for use on client computers associated in some way with the organization. Volume license keys may not be transferred with the computer if the computer changes ownership. This form of licensing typically applies for business, government and educational institutions, with prices for volume licensing varying depending on the type, quantity and applicable subscription-term. A volume license key (VLK) denotes the product key used when installing software licensed in bulk, which allows a single product key to be used for multiple installations. For example, the Windows Enterprise edition is activated with a volume license key.

Below are some commands that can be used to convert a Windows 7/8/10 machine from KMS licensing over to MAK by using a MAK key:

  1. Open an administrative command prompt (or run a remote psexec shell or remote PowerShell).
  2. Change directory to C:\Windows\System32
  3. Run the following command to uninstall the current product key on the system:
    cscript slmgr.vbs /upk
  4. Install the new MAK key using the following command:
    cscript slmgr.vbs /ipk TypeYourMAKkeyHereWith-
  5. Once the new key is installed, activate it using the following command:
    cscript slmgr.vbs /ato
  6. You can check the licensing status using the following command:
    cscript slmgr.vbs /dlv

Device manager shows disk is read only

The following steps will show you how to use Diskpart to look at these settings and also how to clear them.

1.       Open a command prompt, type in Diskpart and then press Enter.

2.       Run the command “List Disk” and press Enter.


3.       Decide which disk you want to look at and then run the command “Select Disk n” where n stands for the number you see from the previous command.  In this case, I am going to look at disk 2.


4.       To see the attributes of Disk 1 now that it is selected, run the command “attributes disk”.


As you can see, I had already set the disk to Read-only, so both the “Current Read-only State” and “Read-only” attributes are set to Yes.

5.       To clear the “Read-only” attribute, run the command “attributes disk clear readonly”.


As you can see, now the “Current Read-only State” and “Read-only” attributes are set to No and the disk is now writeable.  To exit Diskpart, just type the word “exit” and then press enter.

Hopefully this will help you understand these attributes and help you diagnose a read-only problem with your disk.
Powered by WordPress and Bootstrap4